Thursday, September 12, 2013

New house part 7--2012/2013


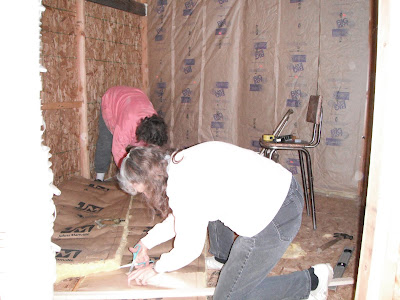
My sisters helping with insulation.

Lucy cutting, Laura and Gloria hanging insulation.

Using more "edgings" for the inner wall panels.

Staining the panels.

We used OSB above the panels.

Charles nailing up the last sheet of OSB behind the staircase.

Painting on the base coat.

This is the color that the outer coat of paint ended up being, not what we were planning but okay.

My boss gave us some wood from her recently deceased Mother's older home that they decided to tear down, and we ran it through the planer, cut, sanded and stained it, then used it for paneling around the clerestory windows.  We also worked on finishing the insulation in the ceiling at the same time.


This is what it looked like after the paneling was finished and we added a shelf and collectables.


Monday, September 9, 2013

New house part 6--Rocket Stove

About Rocket Stoves:  I first learned about rocket stoves probably 8-9 years ago, and have been experimenting with them off and on ever since.  I made an out-of-doors one once out of an old metal igloo water cooler I found in a dumpster, in which a stock pot fit really well and  boiled up to a gallon of water in a very short time.  After our house fire in 2010 we decided we didn't want to deal with normal wood stoves and stove pipes again, so we decided to build a real RSMH (rocket stove mass heater) in our next home.  The idea behind a rocket stove is that there is a short horizontal "burn tunnel" (where the fire burns), the hot gases and smoke turn and go vertically up a longer (usually insulated, to cause a 'draw') "heat riser," and in a mass heater or heating stove it fills the inside of a 55-gallon metal drum where the heat radiates out into the room, and after most of the heat has been extracted what little smoke is left exits through a pipe out the bottom, horizontally, and can even be used for more heating if wanted, even enclosing it in cob or other mass if wanted.  Some models use a short vertical "feed tube" in front of the burn tunnel, in which wood is placed vertically in the tube, the fire is lit at the bottom and is "drawn" horizontal into the burn tunnel.  We tried several versions of a feed tube, and had different measures of success, but finally decided that just placing the wood in the burn tunnel to burn worked the best for us.  It seemed to burn hotter and with less ash than the vertical feed.  We will probably experiment with the feed tube again, maybe we will find a way of building one that will work well enough for us to keep using.  This photo is of our first real RSMH attempt--a six-inch system using normal stove pipe and sheet tin (boy were we naive). 

This is our asbestos-filled triple-wall pipe that exits horizontally through the wall, attaches to some normal stove pipe which goes through what we hope will eventually be our greenhouse (we wanted to heat the greenhouse this way, but by the time the smoke enters the pipe that goes through this area it has actually cooled down enough that, while it is still fairly warm to the touch, it's not really hot.  We hope this will still be warm enough to keep it from freezing in there when we get the room finished . . . ).  The pipe then turns and goes vertically up the outside of the house high enough to draw well.  We actually used to have a problem with backdraft when the wind blew hard, but pretty much fixed it by attaching a 6" whirleybird (those things they put in attics to draw out the heat, that only spin one way and don't allow air to go back down) to the top of the pipe.  We accidentally discovered that this actually solved another problem we had (which many rocket stoves have, apparently), which was to get the draft going well when first trying to start up the fire.  Now I get the fire set up, light it, and run outside (often through the snow) and tap the whirleybird with a long pole to get it twirling.  Within just a few seconds the smoke begins to pour out, and as soon as the pipe warms up a bit (a minute or so) I can actually hear the fire whoosh and begin to make the rocket roar (which it is named for) and can go back inside.  Now I just have to figure out some system to spin the whirleybird from inside without having to go out in the snow :)

This was our insulated (we used wood ash) inner container, which we enclosed inside a 55-gallon drum.

We built the base for our rocket stove on a 4 x 8 sheet of concrete board set up on some cinderblock so there would be an air space between it and the wood floor.  On top of that we set up more cinderblock and brick to surround the burn barrel and to set the 55 gallon drum on, and encased it in a wood frame filled with dirt (eventually to be enclosed in a brick or rock facade) so there could be no chance of a house fire.

We "blacked" the top of the drum, which is going to be left open to the air so it can give off some heat quickly while the bottom will be encased in cob/cement/rocks/brick for "mass," which will heat up slowly and give off heat slowly and longer.  We also heat water and cook on the top of the barrel.

This is our first model.  We surrounded the barrel with bricks, hoping they would act as mass and hold in the heat longer.  Unfortunately, it had too much air in between and didn't work very well.  So we needed to try something else.

We also found that the fire got so hot that the stove pipe we used burned out in places, so we decided to replace it with some terra cotta chimney flue bricks we had.  Then we put the bricks back up and filled in between with cob for mass.  This was a "feed tube" attempts--it burned okay, but not very hot, the wood refused to "feed itself" as it was supposed to--we had to push it down to keep it burning, and it had a tendency to smoke a bit.  So we went horizontal again.

This worked a lot better.  However, we found that the fire got so hot that the terra cotta bricks eventually cracked.  

So we found a source for heavy duty metal well casing and had some cut to our specifications--one 34"tall 6" pipe for the vertical heat riser, and a 14"long piece of 8" pipe for the horizontal burn tube (inside of which we lined with bricks set in ashes on the bottom so the area of air entering is the same as that going out, but the shape of which we have found makes it easier for larger pieces of wood to fit in than just regular 6" pipe).  We even had him cut out an 8" tall x 4" wide chunk of a 16" long piece of  6" pipe that we can play around with and see if we can make a feed tube out of sometime.  After we took apart the bricks and put in the well casing we decided to use river rocks instead of bricks this time.

We added some ducting to bring in air from outside to keep so much of the warmed air from inside getting drawn up the chimney and pulling in cold air from outside through any cracks to replace it (our house is definitely not air-tight yet).

Almost finished.  And it works really well--the rocks heat from the top ones first down to the bottom, take 2-4 hours (depending on the kind/size/amount of wood used) and stay hot for several hours.  The fire gets so hot that we even had to put bricks on the top of the barrel for our "water heater" pot to sit on so the water would just keep hot instead of boiling all the water out.  Unfortunately, we found one more problem, so the rock work on top is going to have to be removed and redone.  When we put in the heavy vertical heat riser we set the back edge on some bricks but rested the front edge on the top edge of the horizontal burn tube.  We didn't realize it would get so hot that the weight of the vertical pipe pressing down would actually flatten the top edge of the heavy metal burn tube somewhat.  So we're going to have to go in and turn the burn tube so the flattened edge is at the bottom (it doesn't matter if the bottom is flat, we line it with bricks set in ashes anyway, but the flat top restricts the size of wood we can use), and put some bricks at the side for the vertical pipe to sit on without putting weight on the burn tube.  Hopefully that will be the last problem we will have to deal with and we can put it all back together and finish it off permanently. 

Sunday, July 21, 2013

New house part 5--2011/2012

Kelly digging the hole for our water tank.

2500 gallon water tank is in.

We also have a 500 gallon tank under the kitchen floor that we access using an Amish pump.
The stairs needed some hard work to figure out how to get them to fit the area they needed to go in.

Stairs are half done.

Looking up from the kitchen.

Almost finished.

Done at last!

Looking down from the loft.

I have to plant tomatoes, but when the deer eat everything in reach the only place to keep them safe was on the roof!

More plants.

This was our garden, 2012.

The garden from the parking lot.

We finally put up a small (8 x 16 foot) garden area to plant the tomatoes in the ground.

New house part 4


Insulation in kitchen wall.

Sink and propane stove in kitchen.

Dining wall ready for insulation.

Insulation in dining room wall.

Some cupboards and propane fridge added.


These are "edgings" (2 x's left-overs) that we get free from the local mill, and use for lots of things.

Charles is nailing together some edgings that we beveled using our table saw, cut to size, and sanded to make wall panels for our dinning room area.

Charles nailing up some of the wall panels.

Me, doing some measuring--wall panels in around the dining room window.

Charles resting on the couch in the dining room--first wall section almost finished.

I get to rest, too.


This is our view out of our kitchen/dining room door--eventually there will be a deck out here.

Sunday, July 14, 2013

New house part 3

I braved the heights to put the "whirly bird" through the roof.

Starting the outer rooms around the west side of the house.

Starting the roof rafters over the outer rooms.

Putting in the west bedroom window.

The outer room roofs were constructed from the free edgings we got from the mill.

Kyle and Phillip helping with the front porch roof.

Carpenters in training . . .

Kyle

Phillip

Shawn always seems to find the piano . . .